
Avoiding 3D Print Failures
Print failures are frustrating
Some models simply can’t print successfully without changes. The way you design something affects whether it will work on a 3D printer. Here are the most common design problems that lead to failed prints.

Parts Too Small or Detailed
The standard size of a 3D printer nozzle is 0.4mm. Your nozzle has limits on detail. Fine features smaller than the nozzle width often don’t print clearly. Text that’s too small becomes a blob. If there are any tiny holes, they will close up during printing.
If detail matters, you need to scale up your design or switch to a smaller nozzle. A 0.2mm nozzle can do finer work than the standard 0.4mm, but it prints much more slowly. Sometimes, the better solution is making your design slightly larger so the details will actually print.
Things can look great on the screen, but when they translate to melted plastic, they might not look as clean.

First Layer Doesn’t Stick
The most common failure is the first layer not sticking to the print bed. If the first layer doesn’t stick, then everything else fails.
The main cause of this is that the bed isn’t level. If the nozzle is too far away from the bed, the plastic doesn’t squish down and bond. If it’s too close, the nozzle drags through the plastic, and it makes a mess. Most printers now come with an auto-leveling bed. But sometimes it needs checking.
Another issue keeping the print from sticking is that the bed isn’t clean. Oils from your fingers and residue from previous prints might be keeping your print from succeeding. Some filaments don’t stick to some surfaces. One way to overcome this is to use blue painter’s tape or a school glue stick on the bed.

Separating Layers
Sometimes prints look fine but break easily between layers. The layers didn’t bond together properly during printing. This creates weak spots that fail under stress.
This is usually because the nozzle is not hot enough. If the printing temperature is too low, each new layer doesn’t melt enough to fuse with the layer below it. Increasing the temperature by 5-10 degrees usually improves layer bonding.
Cooling can also be a factor. Your printer has a fan that cools the melted plastic a little. Too much cooling solidifies each layer before it bonds properly. Reducing fan speed usually helps the layers stay warm enough to fuse together.

Overhangs Without Support
Imagine trying to print a letter, T. The top horizontal part hangs out over empty air. The printer can’t just place plastic in midair and expect it to stay there. It will droop or fall.
There’s a general rule called the 45-degree rule. If a part of your model overhangs more than 45 degrees from vertical, it probably needs support. Support material prints underneath the overhang to hold it up. After printing finishes, you break or cut away the supports.
Some designs avoid this problem entirely. Instead of a sharp overhang, you can angle the design more gradually. In the case of the letter T, it would be better to print it upside down. Then the top wouldn’t need supports.
Bridges between two points often work without support if they’re not too long. Thinking about overhangs during the design phase saves you material and wasted time later.

Models Without a Flat Base
In order for your print to succeed, it needs to have good contact with the print bed. A model with a tiny point touching the bed will tip over partway through printing. Round objects want to roll.
Good designs have a flat bottom surface. This makes a stable platform to support your print. If your model is naturally round or pointed, you can add a flat base (called a raft) in your slicing software. Or you can redesign the model to have a flat area. Like cutting a ball in half and gluing it together later. Stability at the start determines whether the rest of the print succeeds.

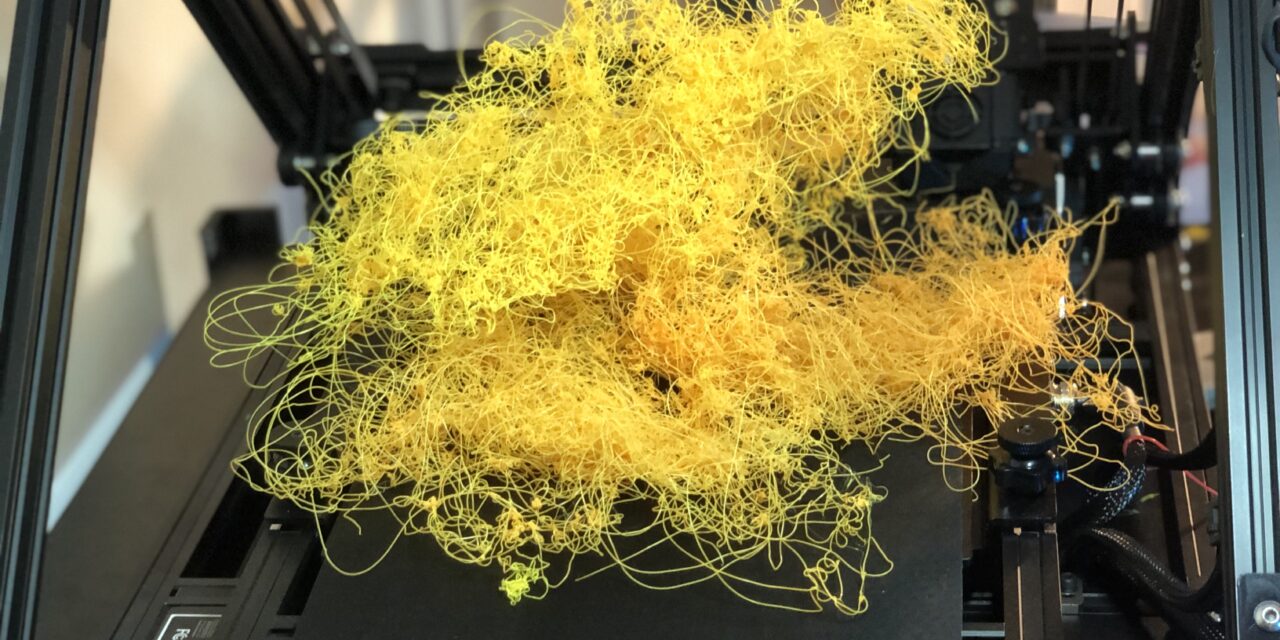
Stringing
Stringing looks like thin hair-like strands of plastic stretched between different parts of your print. It happens when the nozzle moves from one area to another, and plastic oozes out during the travel.
Usually, this is because the hot end is too hot. Different filament types have different melting temperatures. If your printing temperature is too high, the plastic stays runny and drips during moves. Lowering the temperature by 5-10 degrees often reduces stringing.
Or the filament might not be retracting enough. Retraction pulls the filament back slightly before the nozzle moves, preventing ooze. If stringing continues after temperature adjustments, increasing retraction distance or speed usually helps. Your slicing software has these settings, though finding the perfect values takes some testing.

Understanding these problems can help you in your 3D printing journey. Check your settings before starting, and it will save you a lot of headaches.
Think about overhangs early. If you are designing the print, try adjusting angles. Make sure the supports option is turned on in your slicing software. Make walls thick enough from the beginning. Give your model a stable base during the design phase, not as an afterthought.
Preview your model in the slicing software. Look for potential problems. Is the bed hot enough? Is the temperature right for the type of filament? Is the bed level? Catching issues before printing saves hours of wasted time.
Most print failures teach you something. Each failed print shows you a limit or setting that needs adjustment. Over time, you develop instincts for what will work and what won’t. You learn to spot problems in the design file before wasting filament. That knowledge makes you both a better printer operator and a better designer.


